
Text: input and settings
In the “Text” tab, adjust the appearance and readability of the entered text. Enter the text first, choose the font and color, then adjust direction, alignment, and spacing.
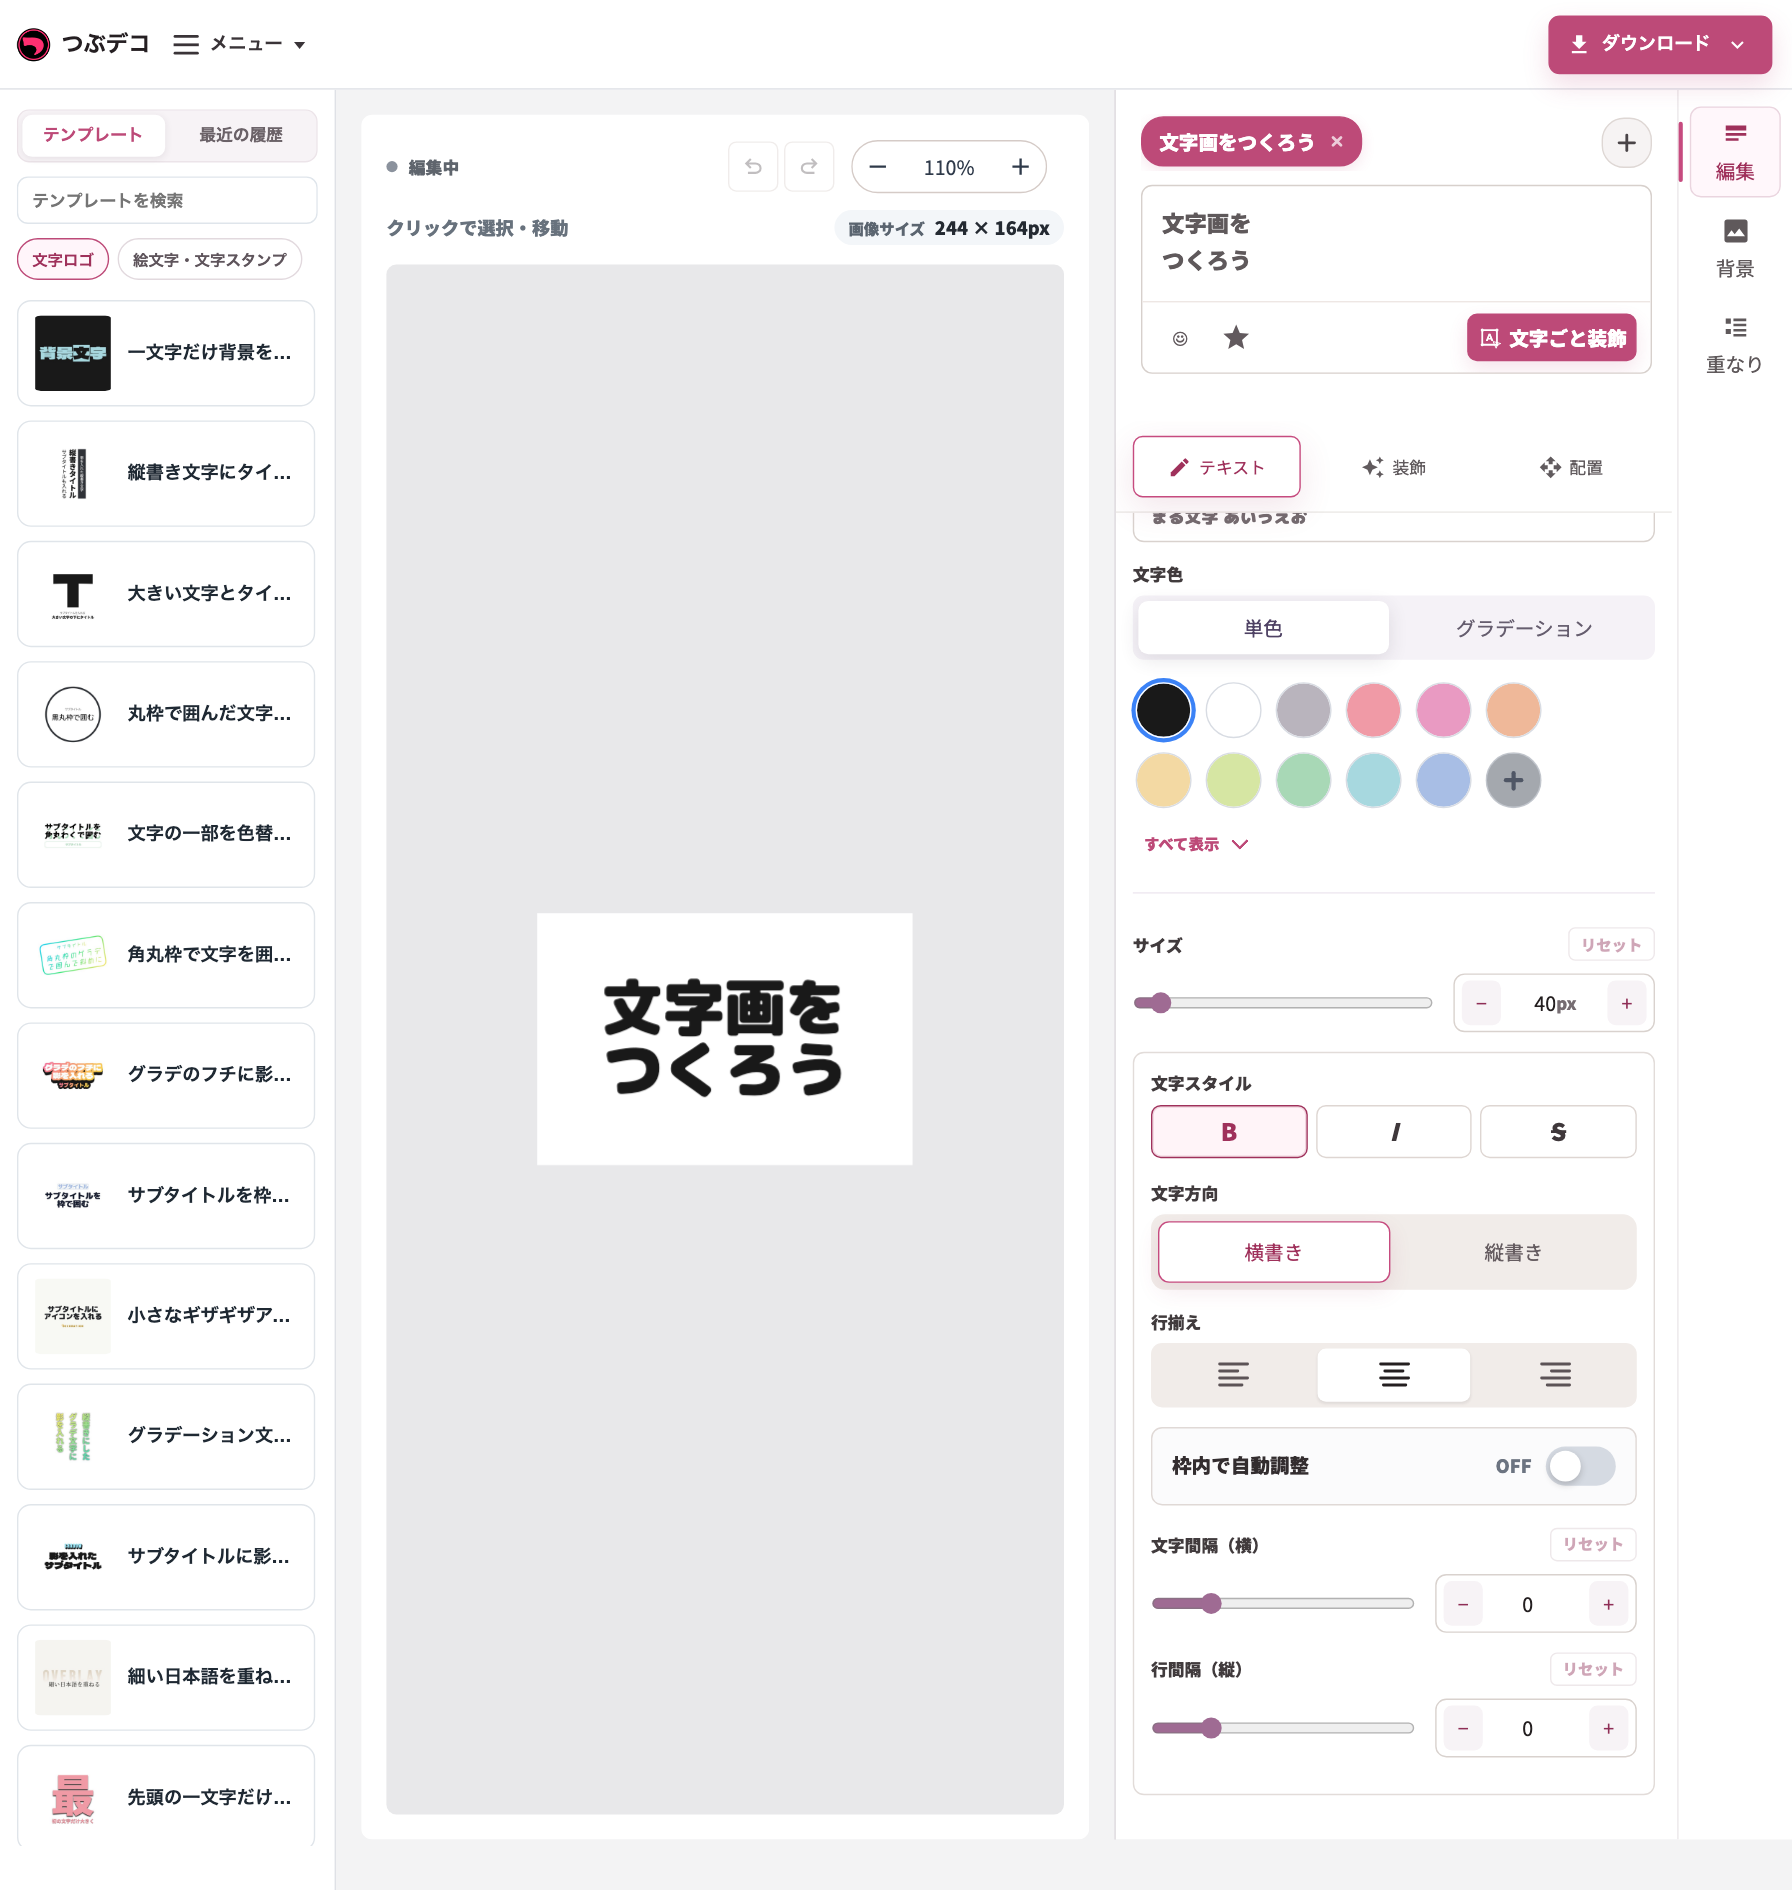
What you can do on this page
You can check text input, font, text color, size, text style, text direction, alignment, spacing, auto-fit inside the frame, emoji and icon insertion, and layer addition.
Operating procedure
-
enter characters
Enter the text you want to show in the input field on the right. Press Enter to add line breaks, and the content appears in the center preview.
-
Choose the font and text color
Choose a typeface from “Font,” and choose a solid color or Gradient from “Text color.” For gradients, you can choose the scope: Whole, Per line, or Per character.
-
Adjust size and text style
Adjust the size, and turn on bold, italic, or strikethrough if needed.
-
Choose text direction and alignment
Switch between horizontal and vertical writing. For horizontal writing, adjust position with line alignment; for vertical writing, use vertical alignment.
-
Check spacing and auto-fit
For horizontal writing, adjust character spacing (horizontal). For vertical writing, adjust character spacing (vertical) and line spacing (vertical). If text does not fit, use auto-fit inside the frame.
-
Add emoji, icons, or layers
Use the buttons in the input field to insert emoji or icons. From the “+” in the editing tools on the right, choose “Add text” to add a new text layer. See “Adding elements” for details.
List of setting items
| Item | Description |
|---|---|
| Font | Choose the typeface for the text. |
| Text color | Choose a solid color or Gradient. For gradients, you can choose the scope: Whole, Per line, or Per character. |
| Size | Adjusts the text size. |
| Text style | Toggles bold, italic, and strikethrough. You can use more than one at the same time. |
| Text direction | Switches between horizontal and vertical writing. |
| Line alignment | For horizontal writing, choose Left, Center, or Right. |
| Vertical alignment | For vertical writing, choose Top, Center, or Bottom. |
| Auto-fit inside frame | When turned on, the text size is adjusted automatically so it fits within the template display frame. |
| Character spacing (horizontal) | Adjusts the left-right spacing between characters in horizontal writing. |
| Character spacing (vertical) | Adjusts the up-down spacing between characters in vertical writing. |
| Line spacing (vertical) | Adjusts spacing between multiple lines in vertical writing. |
| Insert emoji or icons | Adds emoji or icons to the text you are entering. |
| Add layer | Adds another text block. You can set its position and Decoration separately. |
Check points
- When you change text direction, the alignment settings also switch between horizontal and vertical options.
- Increasing character spacing or line spacing may make text extend outside the display frame.
- For long text or multiple lines, turning on auto-fit inside the frame makes it easier to check whether everything fits.
When you are in trouble
If the text looks cramped, increase the spacing slightly. If it extends outside the display frame, reduce the spacing or turn on auto-fit inside the frame.